
Many people without technical backgrounds often wonder how to develop an app with no experience.
App development may look like sorcery, but there’s very little magic involved.

Instead, building an app is a science with a systematic process and predictable steps.
You can break it down into a million things, but we’d recommend a more digestible list.
Here are the six steps to developing an app as a non-tech founder with zero experience:
- Selecting an idea
- Validating for market need
- Sketching out Features/Requirements
- Deciding to go No-code/Developer/Co-founder
- Testing & launching
- Gathering feedback & iterating based on user need
Simple in theory, tough in execution – these steps are about action.
Developing an app can take up to four months – maybe more – to go from planning an app to developing and launching it.
We’re here to make your journey as easy as possible.
We’ll give you templates and action items to go as far as you can as a non-technical person before you need to call in the big guns (aka mobile app developers)
If you’re ready to put in the work, let’s cover how to develop an app with no experience:
Step 1: Select Your App Idea
Objective: Find a potentially profitable app idea that is a good match for you.
Here’s a template for you to easily flesh out your app idea.
App Idea Evaluation Template
Download this FREE editable template now to brainstorm and evaluate your App Idea! Let us know where should we send it through the form below.
Let’s walk through the template (be sure to download it!).
Part 1: Identifying your user persona
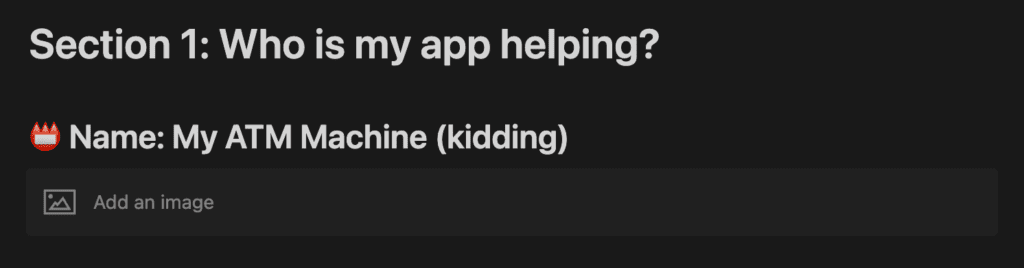
This is where we describe our primary audience and their problems.
Give the user a name that makes sense and try your best to step in their shoes – identify their passions, habits, goals, and most importantly, their pain points.
Part 2: Describing your proposed solution
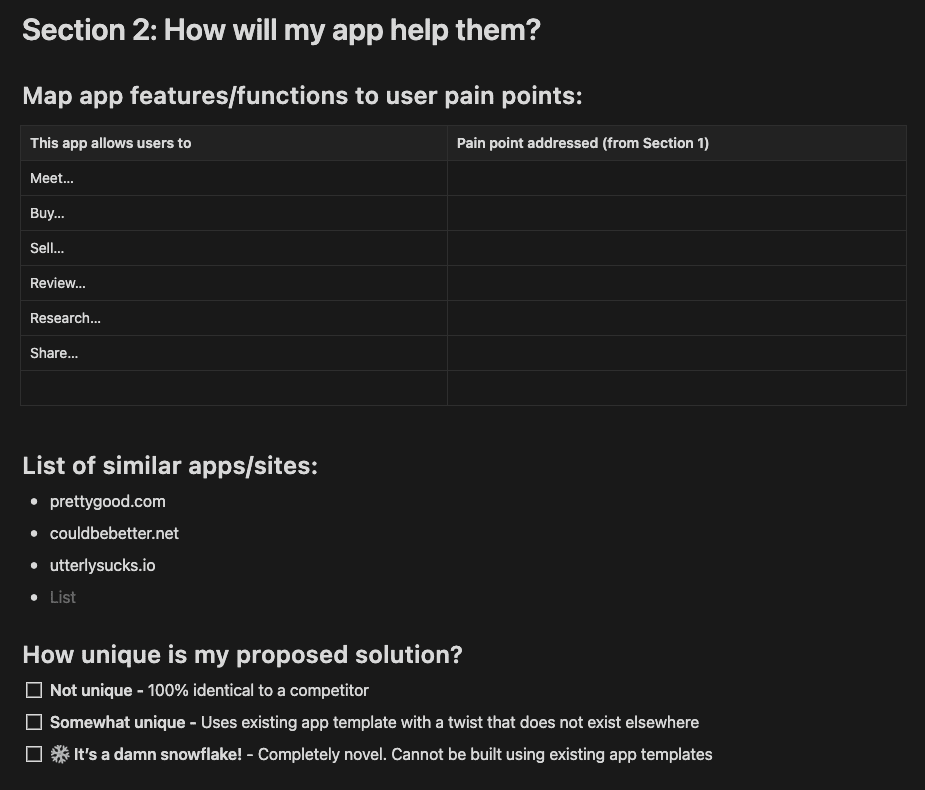
There must be a clear link between the solution proposed and the problem faced by your target audience.
Next, scope out the competition to find out how original your idea is.
Finally, see the three uniqueness options?
It’s not the best idea to be a 100% clone but being 100% unique isn’t ideal – the more unique, the more custom development will probably be needed.
The best case is something in the middle that adds a unique twist to a proven framework.
It’s always faster and cheaper to renovate instead of building from scratch.
Part 3: Evaluating your suitability for the project
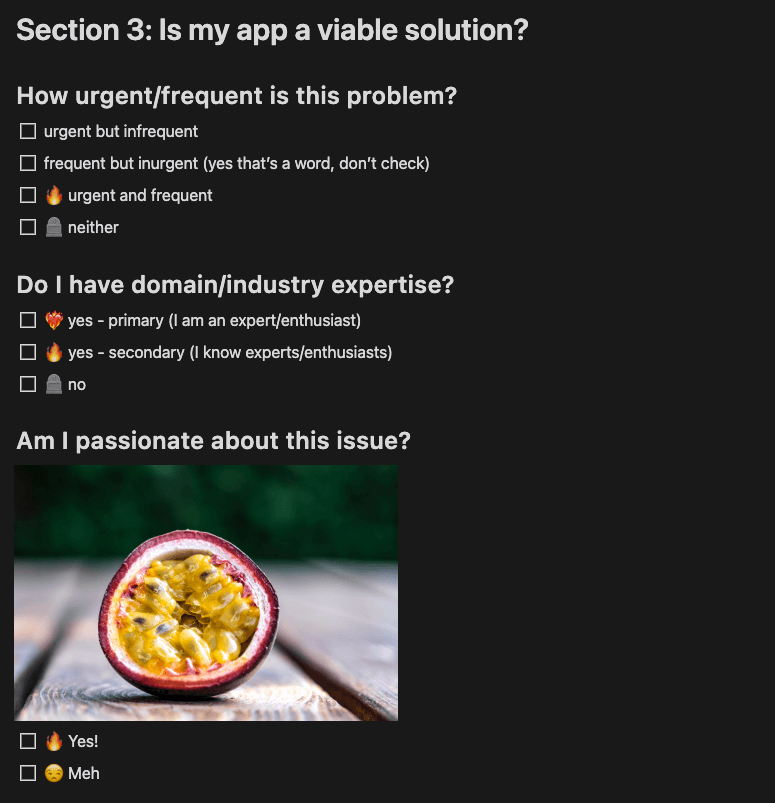
Just because it’s a problem doesn’t mean it has to be solved.
Just because it has to be solved, doesn’t mean it’s by you.
First, establish that the problem is either frequent or urgent, preferably both, but never neither.
Next, consider your domain expertise.
Are you familiar with the industry?
Do you have a network of contacts – and if yes, Is it a long list of knowledgeable and influential people?
Or is it just your father-in-law – and he doesn’t even like you.

We stay out of family dynamics at Upstack Studio but just know that having genuine domain expertise makes it so much easier.
Lastly, are you passionate about solving this problem?
Sounds cheesy, but everyone needs a bit of cheese in their lives!
App development time can easily get stretched due to delays and hiccups.
You might as well be asking how to develop an app with no experience, interest, knowledge, or financial backing.
If your heart’s not in it, what’s to stop you from just throwing in the towel halfway?
Ideally, you want an app idea that:
- solves a problem that’s frequent or urgent
- uses existing app structures but adds a unique twist
- you have domain expertise in
- you are passionate about
So, how much time should you spend on this?
Half an hour tops.
Get an idea, screen it, and if it doesn’t immediately sound good, on to the next one.
Ideas come and go all the time – give it some thought, but don’t overthink.
Step 2: Validate Market Need
Objective: Find out if your target audience would actually pay for your solution
Sounds like you’ve got something, but so far, you’ve only asked yourself and your computer.
You need to hear from the very people you intend to help.
If your app will help people with disabilities, you need to speak to people with disabilities.
If your app is meant to help doctors, speak to doctors.

Here’s what we don’t want you to do: you know those sites where you put up a survey and pay strangers a dollar to answer them?
Don’t bother.
If that’s your main way of validating market needs, don’t be surprised if hundreds of positive responses translate into zero actual sales.
They’re unreliable, inaccurate, and cannot replicate the level of insight you will get from a one-to-one talk with a fellow human being.
You need to find a way to speak to people in person or via online video calls.
When you talk to them, establish three things:
- Screen for validity – ask questions that confirm they are your target audience
- Understand problem(s) – do they really face the issues you want to solve?
- Determine commitment level – ask how much they’d pay for an app-based solution
For number three, we recommend giving options in the form of ranges, such as:
- 50 – 100 dollars a month,
- 100 – 150 dollars a month,
- so on
Don’t add zero dollars as an option – if it’s really zero dollars, they’ll tell you.
For this step, don’t think about how much time to allocate; think of how many people to interview.
We’d say no less than 5 valid interviewees who validate your theory.
P.S. ask them to be your future testers – play your cards right and they’ll also be your first customers!
Step 3: Sketch Out App Requirements & Features
Objective: To visualize your app layout and functions and trim down to essential features.
Let’s start by showing what you ultimately want to create:
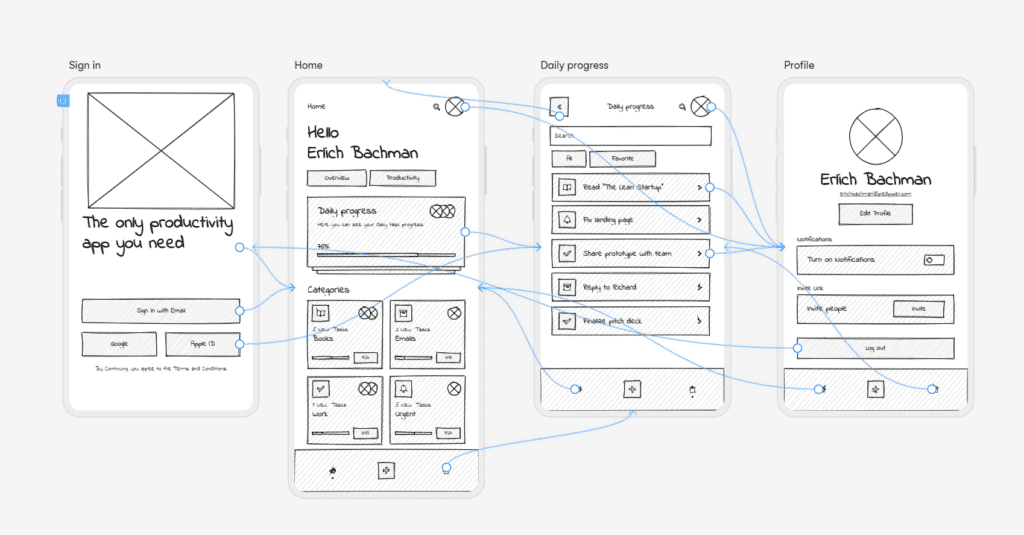
This is a combination of a user flow and wireframe.
A user flow is a map of the steps users take to achieve goals on an app. It helps us predict user behaviour and obstacles they may encounter.
A wireframe is a simple black-and-white sketch of an interface.
Understand the user flow and make sure the interface facilitates it.
Time to draw.
If you’re old school, pen and paper will do.
If you prefer digital, we’d recommend using a mobile app wireframe template or website wireframe template on Uizard.
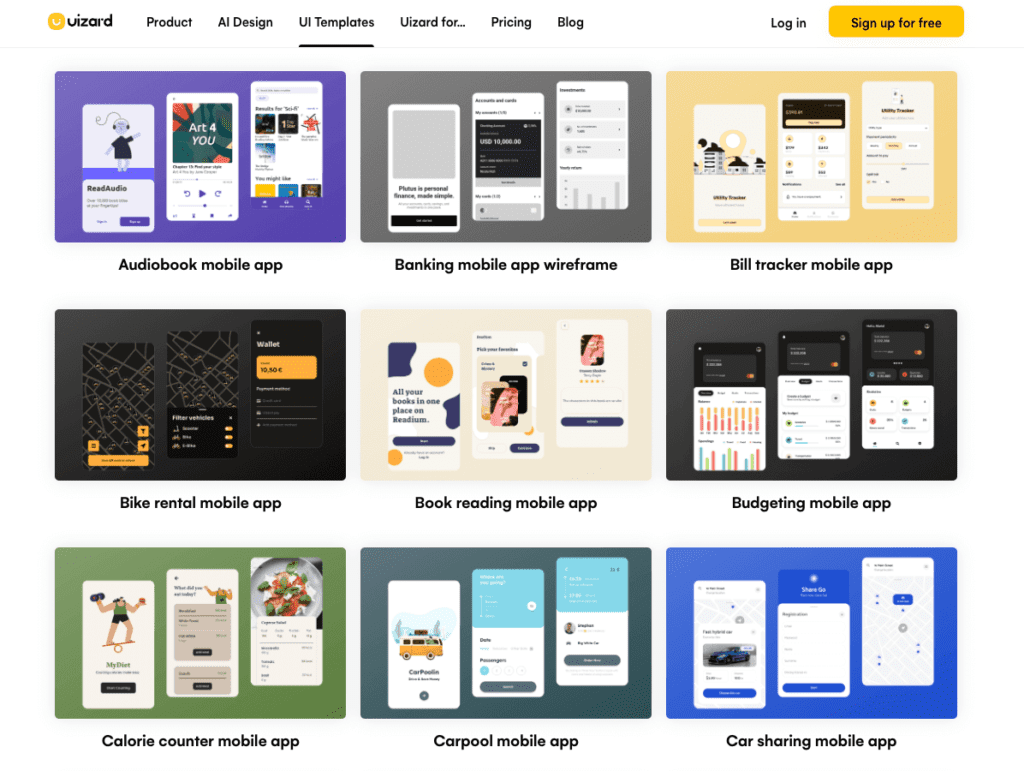
When it comes to wireframing, we’ve yet to experience a more intuitive and feature-rich platform.
It also has this really cool feature where you can draw your wireframes on paper, then scan them and it appears as digital designs on a Uizard project!
Whichever method you use, pay special attention when sketching out sections that enable key features.
It must facilitate whatever users must be able to accomplish.
Once you have everything drawn out, time to review and trim the fat.
Ask yourself: If my app didn’t have this screen or feature, could my users still solve their problem without struggling?
Whenever the answer is yes, burn it with fire.

Honestly, if it truly comes down to one screen and a button, so be it.
That would actually be incredible. Not many people can say they made a profitable app with one button!
Give yourself a week to finish the wireframe.
If you’re getting expert help, they’ll sit down with you and sort out the details.
If you’re going solo, join an online community and get them to have a look and give feedback.
Step 4: Decide to go No-code/Developer/Co-founder
Objective: To decide the best way to begin MVP development.
If you’ve done step 3 right, it’s time to start development and bring your wireframe to life as a Minimum Viable Product.
If you don’t know how to code, you have three practical choices:
- Use no-code tools to build the app yourself.
- Hire a development agency like Upstack Studio or a freelancer.
- Find a technical co-founder who’s willing to work for part-ownership.
- If you’re limited by budget but not time, wait for a technical co-founder.
- If you’re limited by time but not budget, hire an app development agency or a freelancer.
- If you’re limited by time and budget, go with a no-code app builder.
Whichever you decide on, it’s time to start building.
Give it 12-16 weeks for the first iteration of your MVP to be ready for public eyes.
That’s more of a general estimate, though.
If you or your developer think it’s ready sooner, go for it.
Step 5: Test and Launch Your MVP
Objective: To ensure the MVP works as intended, and to launch the MVP on app stores.
By now you have a prototype that’s almost ready.

We need to go over the app with a magnifying glass to test flow and features.
Unless you’re developing the app yourself, you should be the primary tester.
Whatever your developer or co-founder releases or updates, test the crap out of it.
If this is your first time, repeat after us:
There is no such thing as bug-free software!
Developers and bugs play an everlasting game of cat and mouse.
This is true of any app – the priority is to make sure the user experience is unaffected.
Once you’re satisfied, time to call those interviewees from Step 2 and have them test your app.
They’ll be thrilled that the conversation led to a solution to their problems at a reasonable price point.
That’s how you get your first batch of customers.
As for the rest of testing, expect it to take about two to four weeks.
After that, time to submit the apps for Google and/or Apple to review.
Whatever the launch date, submit your app for review at least two weeks beforehand.
This gives time to address any changes requested by the app stores without risking the launch date.
Step 6: Gather Feedback and Iterate Your App
Objective: To fix bugs and make changes to the MVP based on genuine user feedback.
By now your app is live in app stores, ready to serve its first batch of real-life users!
Remember us mentioning that you can’t let bugs get under your skin?
Trust us, there were more that snuck by undetected.
And new users will tell you.
So, keep an eye out for incoming reviews on your app store pages.
You should also have a pop-up in your app that asks for feedback.
Listen to what users say and decide how to address them (check out our guide to App Store Optimization).
You don’t want to say yes to everything – you can’t afford to.
Now, obviously, if screens are crashing every minute, fix them.
But users complaining about a missing feature is a gray area.
Implementing it means more costs; not necessarily more returns.
Times like these, it’s good to have a co-founder or a developer to talk to. If you’ve gone the no-code way, time to ask that online community of non-tech founders. Get a second opinion on how to move forward.
This step of feedback and iteration lasts the lifetime of your app.
That’s right. You’re now a hotshot app founder.
All eyes are on you whichever room you walk into.
Women openly stare at you.
Mainly because you haven’t showered for months and smell like an open sewer.
Your wife left you ages ago and you now go to bed spooning your laptop.
It’s all good, so long as you have your app by your side.
There will always be new bugs. Users will always want new features.
Eventually, you’ll be a wiz at dealing with both, and by then you’ll be teaching others how to develop an app with no experience.
Hey there stranger, thanks for reading this all the way to the end. Consider joining our mailing list for a one-stop resource on how to develop an app with no experience and become a well-rounded founder. Get a nifty list of questions to ask app developers when you sign up!
App Developer Interview Questions Template
Download this template now so you know exactly what to ask App Development Agencies! Let us know where should we send it through the form below.

